
Last Updated on April 1, 2023
“Drum” – the simplest and fastest form for diy lantern. The choice of motive is limited only by your desires and imagination. “Houses” are cubes or other prisms. Here you have to work more and plan more time, that is, this is an option for older children.
part 1 – lighting possibilities, basic materials,
part 2 – papier-mache, lampions, papier bags,
part 3 – polygons, “cheese package”,
DIY silhouette lantern for Saint Martin feast. Part 5
Separat about feast and songs for it.
Bascetta star tutorial
German school cone (Schultüte). How to make
For “drums” and cubes, a blank base is sold*.
Diy lantern in form of drum
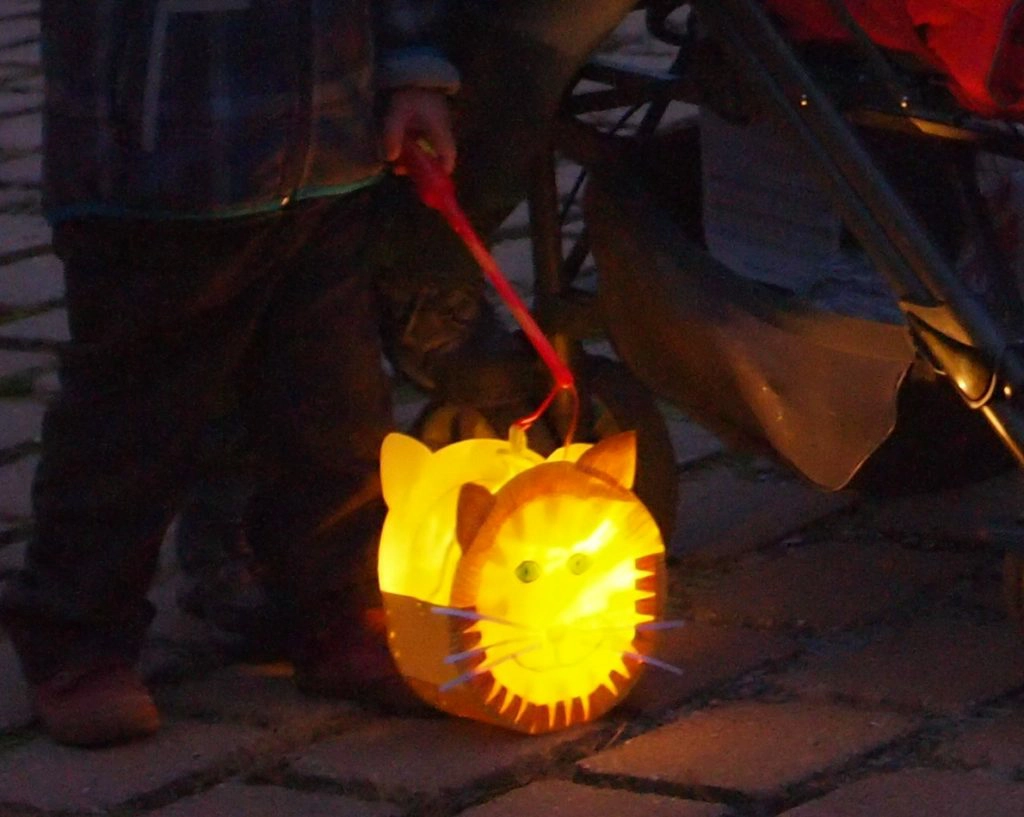
It can be a sun, a tiger, a hare, a cow, a dinosaur, a fish or an owl … and even a car – whatever your and your child wants and you can picture or copy from the Internet.
The basic shape is a drum placed vertically: two circles and a strip between them. Next, add the head and legs.
There are two options for attaching the strip connecting the two sides of the lantern.
Firstly, it can be color paper, which you fold evenly several times, and cut into cloves for gluing. There will be a flat area for the candle below. The strip usually does not reach the very top, that is, somewhere a quarter or a third of our lantern remains open. My strip is too short, almost half of the lantern is open.
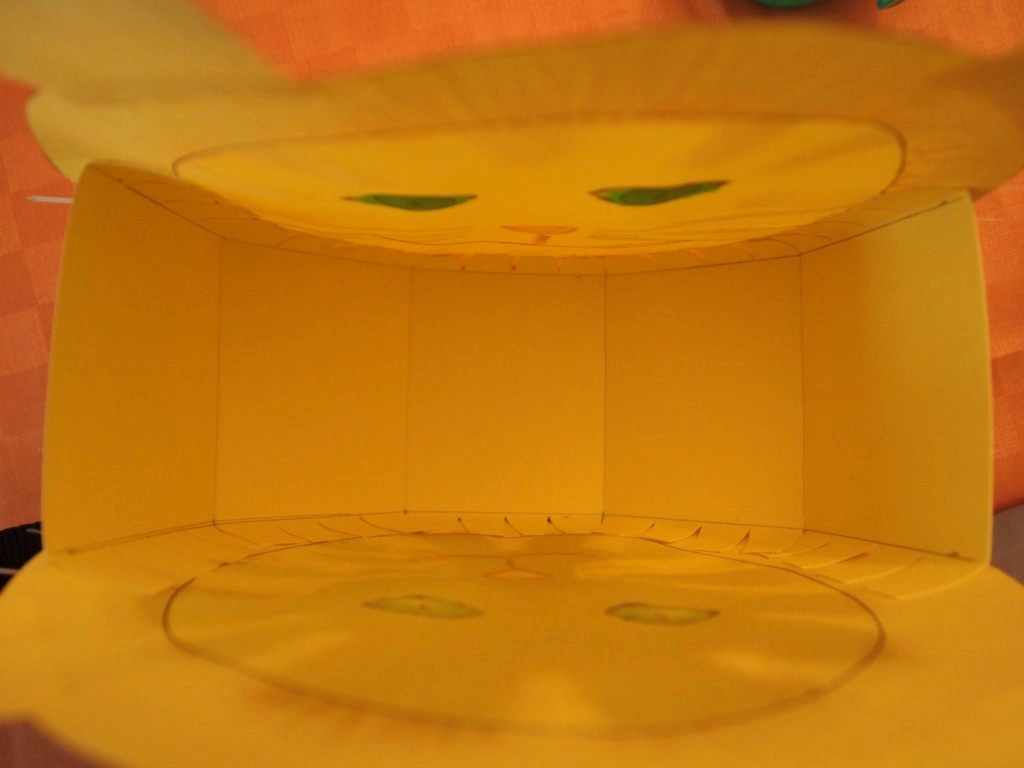
The second option is a strip of corrugated paper (but non-corrugated paper is also made). Being more flexible, she can repeat the complex shape of our animal, and not just walk in a circle.
And the third option is the purchased bases.
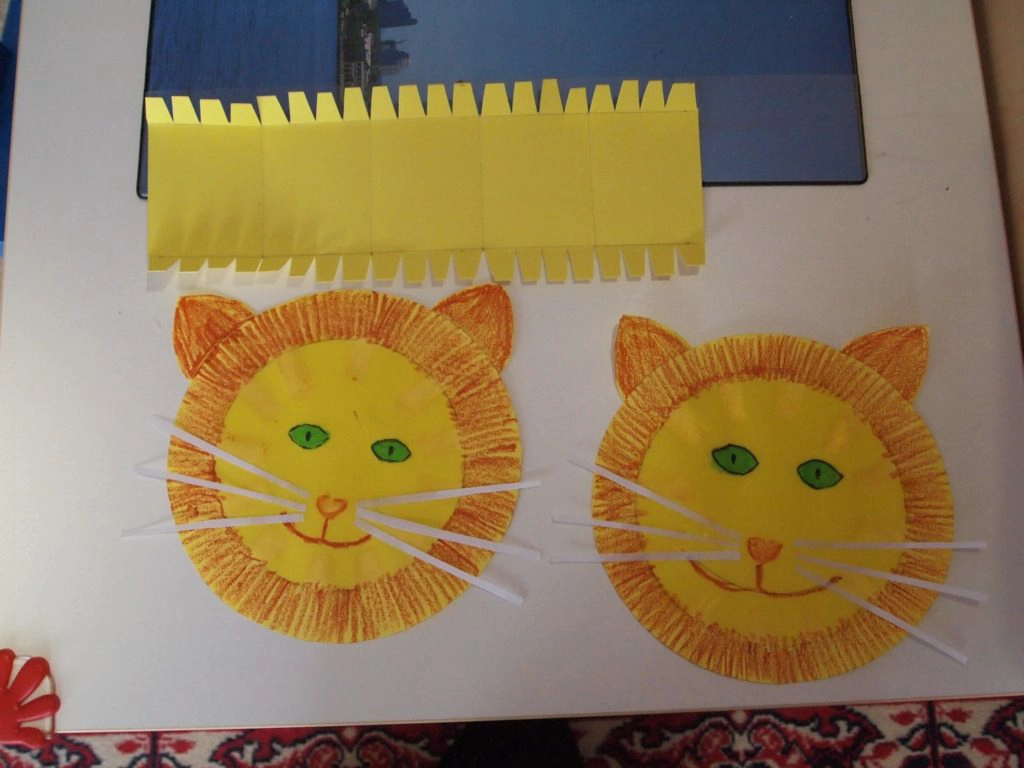
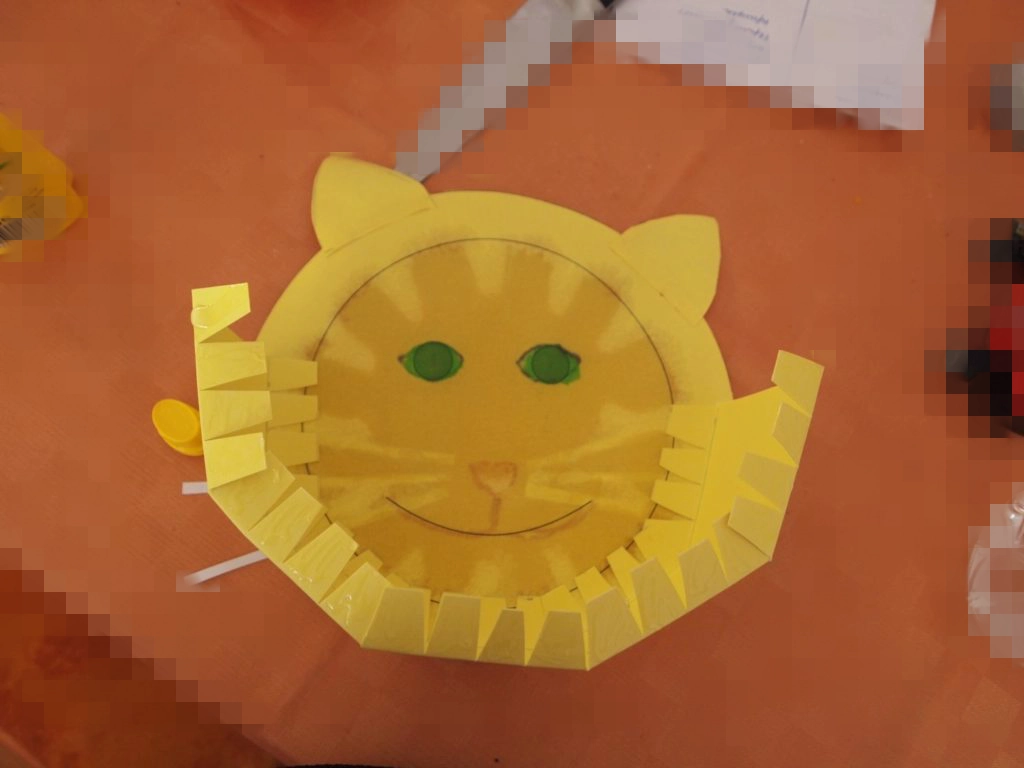
Now let’s move on to the design of the main, so to speak, substantial part of our lantern. Above we have a tiger / cat – the simplest form that a child himself can make. The simpler, perhaps, only the sun.
The circle was oiled except for the stripes and “wool” around the edges.
The interior part, which I have oiled, is sometimes cut out and sealed with transparent paper. But colored oiled paper gives brighter colors.
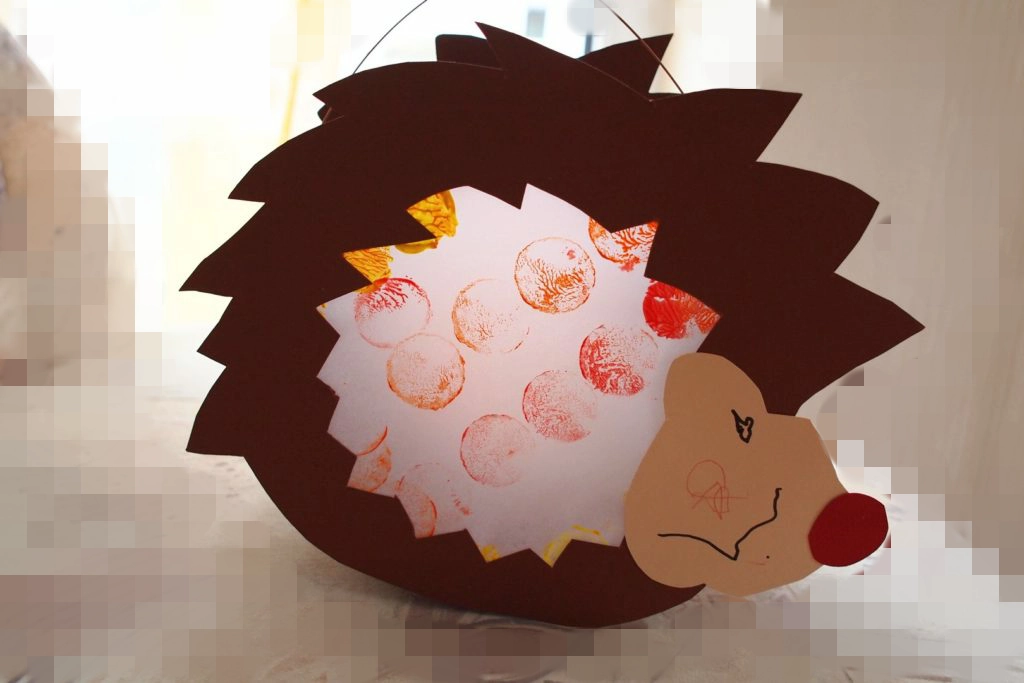
I have three such hedgehogs from different kindergartens. I don’t know why the educators liked them so much: when illuminated, the result is very dull.
Window Cutting Technique
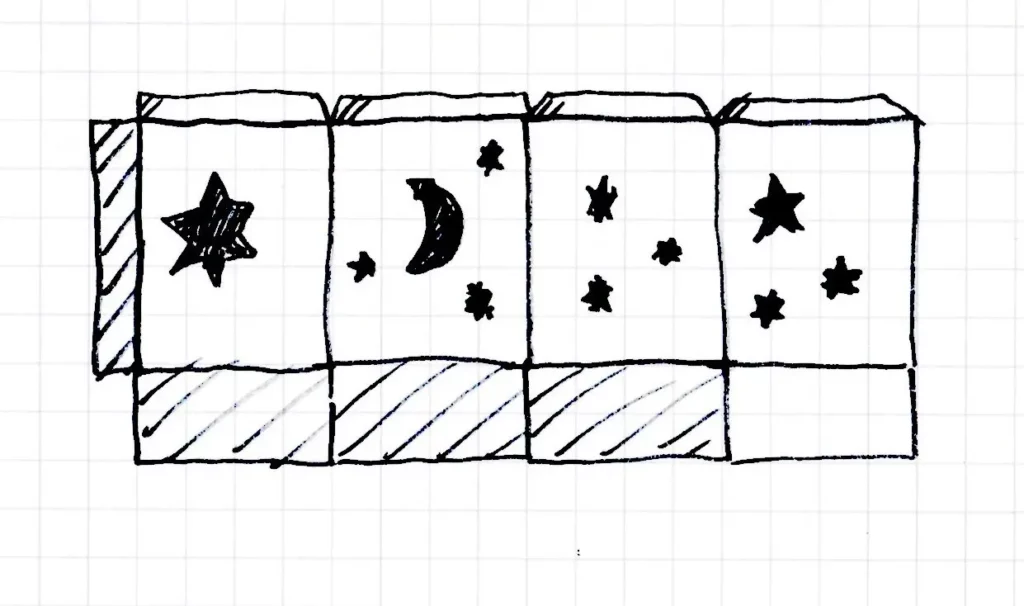
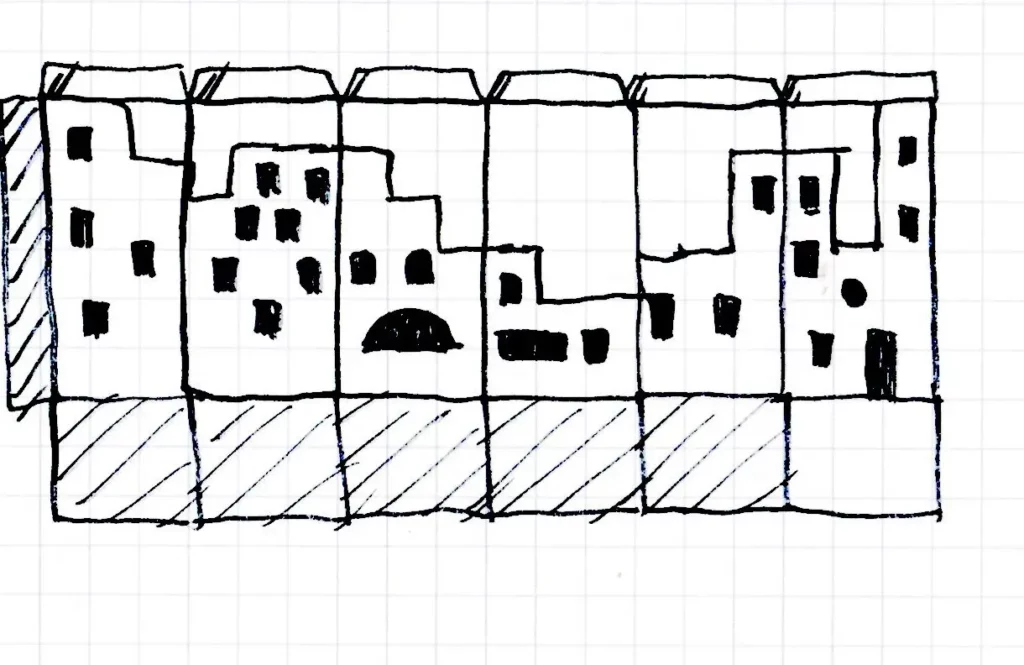
For a while, let’s digress from different forms and see how lanterns with windows are made.
The shape of the windows can be different:
- windows in houses in a city, castle or palace (rectangular or semicircular)
- stars, moon, leaves, geese …
- rhombus (fish scales or bird feathers)
They all have something in common: behind these windows are covered with colored-oiled or transparent paper.
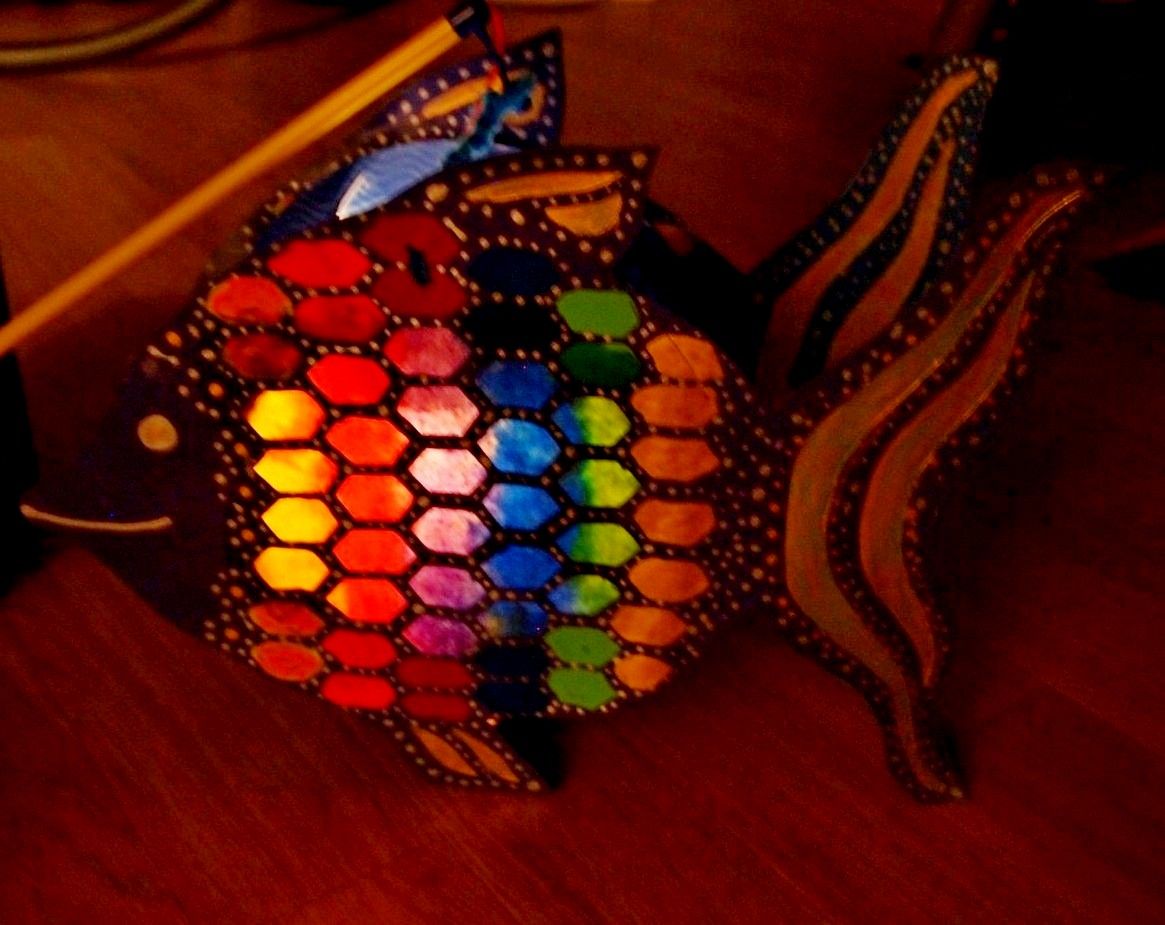
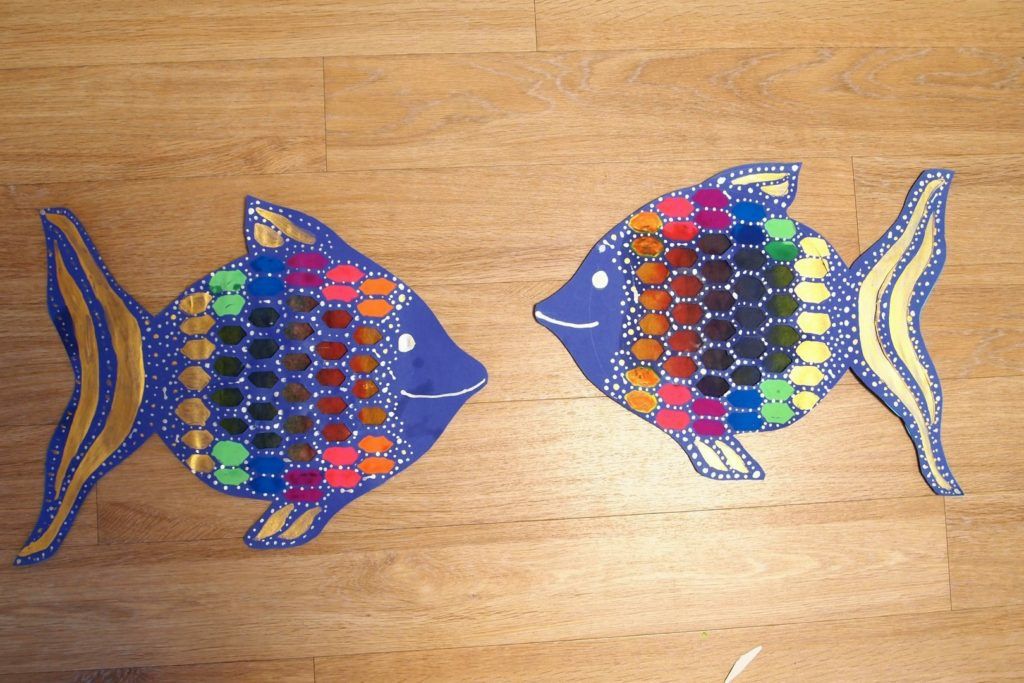
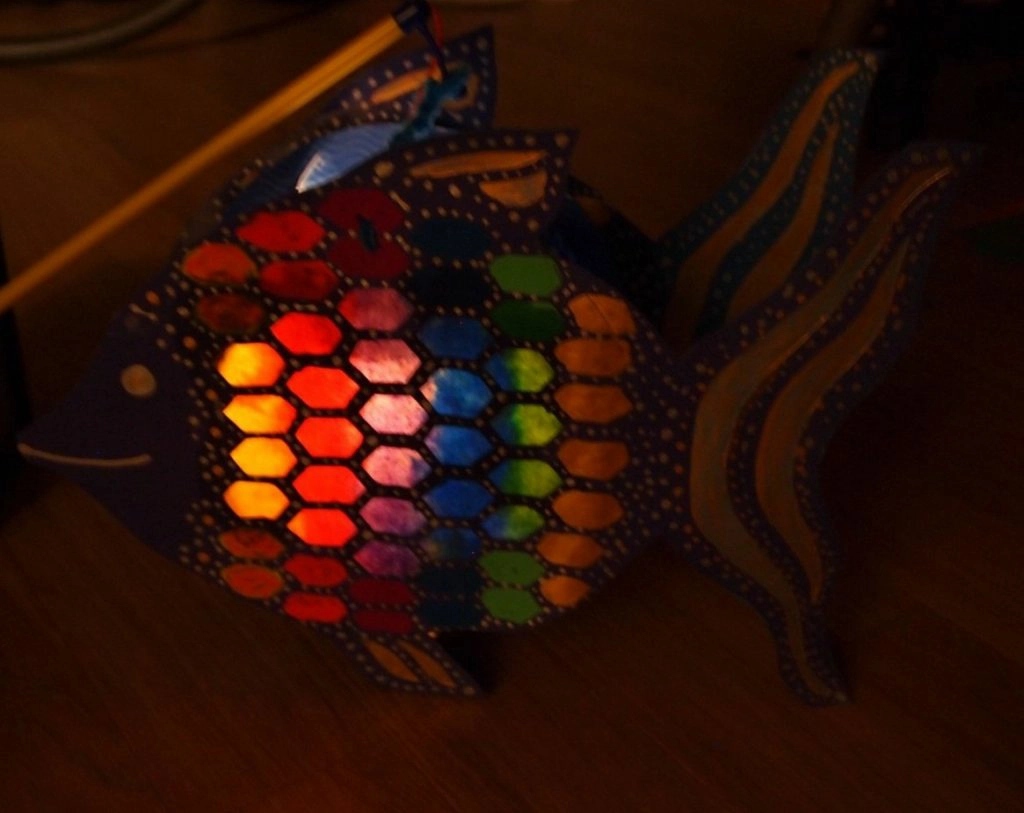
Let’s take a closer look at a fish lantern with scale windows.
Net production time: 2 hours.
You will need:
cardboard (preferably, but not necessarily A3) – two sheets of the same or similar shades,
transparent paper / colored paper,
paints (for example, neon from Ikea),
PVA or a glue gun.
Optional base for lantern (sold in many shops or art departments). If there is no base, then it is easy to do it yourself (see above)
Instruction
1. Make or buy a base. Color it if needed.
2. Draw a fish (owl) on a sheet of cardboard, taking into account that its body with transparent windws has to overlape the “window” of th base. Mark on the fish where the open part will be, and where the fastening strip is. Cut out the same fish on the second sheet of cardboard.
3. Cut out “scales” – I chose this elongated hexagon, but it may be a different shape. The cut scales should be inside the “window” of the base. Repeat the same with the other side.
4. Glue transparent paper / pieces of colored paper on the holes on the back side oiled then). I took a blotter and painted it with ink (liquid watercolor) with a color transition. The blotter also needs to be oiled. You can choose any color, but make sure it glows brightly enough in the dark. Pay attention: two parts of the fish must be mirrored! I’ve added work to myself, forgetting about it.
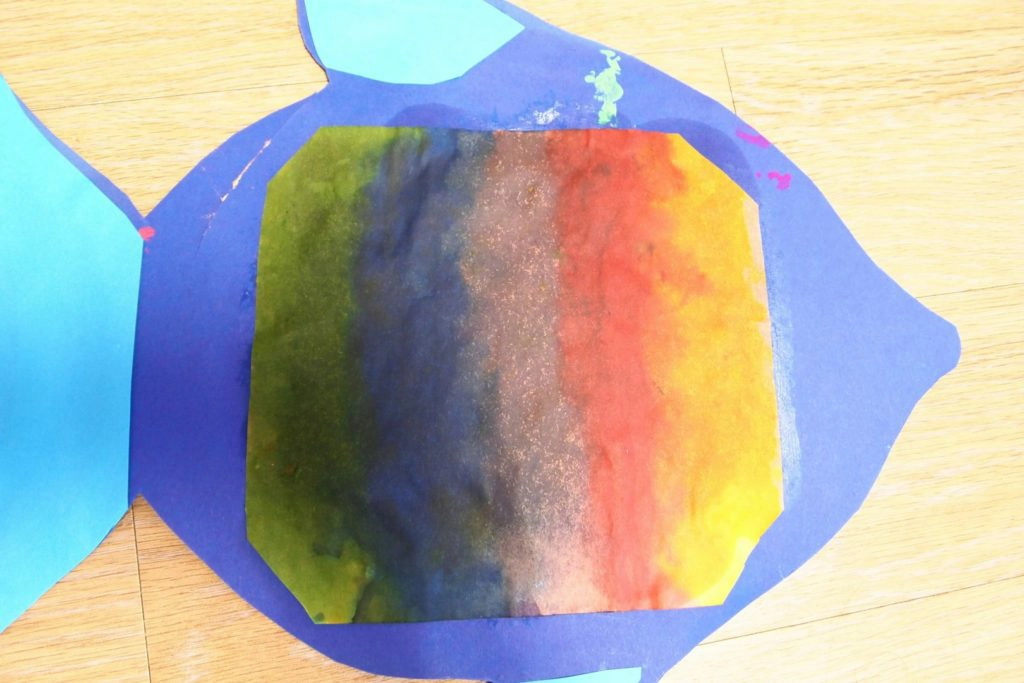
5. To decorate the non-luminous part of my fish, I made the scales with neon paints from Ikea. The same paints made dots in the technique of dotting (well, it is loudly said “in technique” – here I was already too lazy and I did not draw the points carefully).
6. Fins and tail. At first I made slits and wanted to stick transparent paper as well, but then I realized that the light bulb would not illuminate there, so I painted it with the same neon paint.
7.Wait for the paint and glue to dry completely and stick to the base. I glued it with a glue gun, where it didn’t work out – PVA (Holzleim).
8. In the process of gluing and checking the glow, it turned out that the inner side of the tail and fins also need to be painted over, otherwise it is ugly.
DIY lantern House
The principle of creating cubes and prisms:
separate the bottom + “posts”
or whole sides with “ears” for gluing.
Flat pattern for a cube with side “posts”.
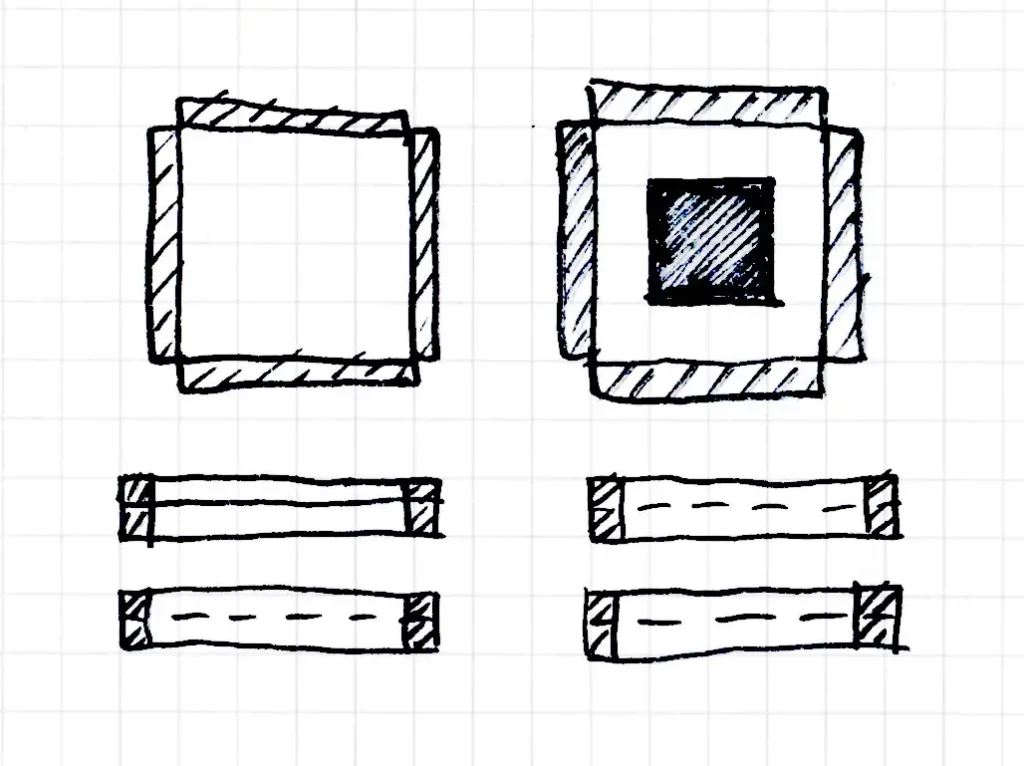
This is a cube as whole sides. There must also be a square bottom
or
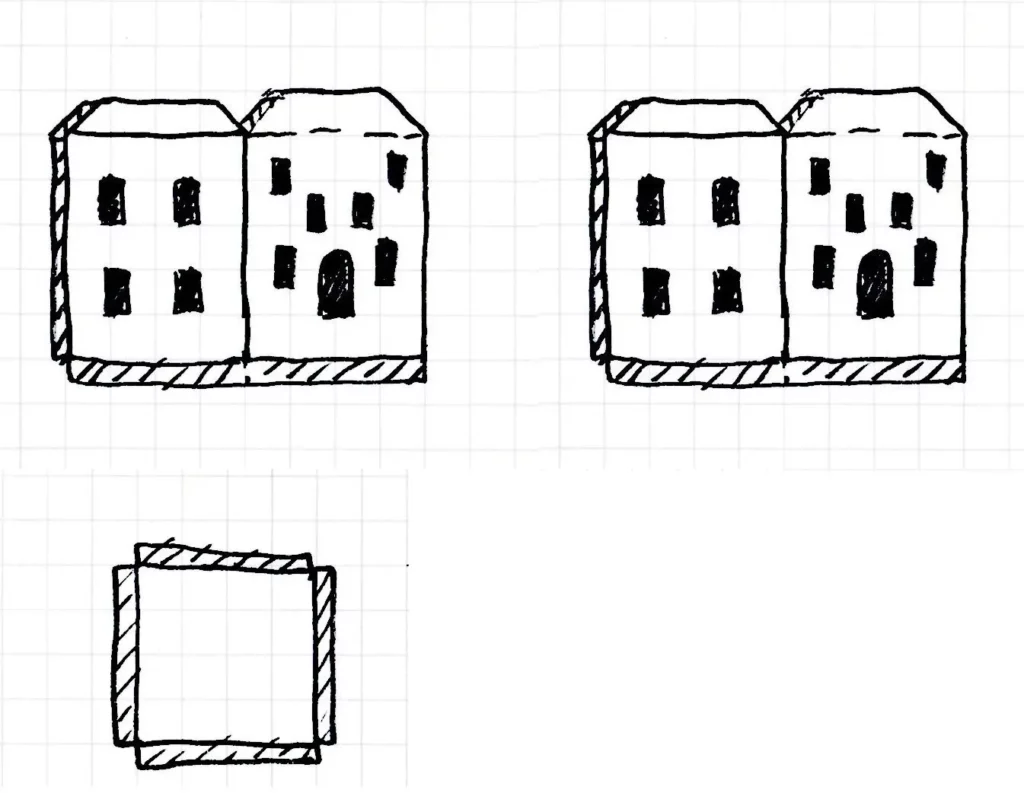
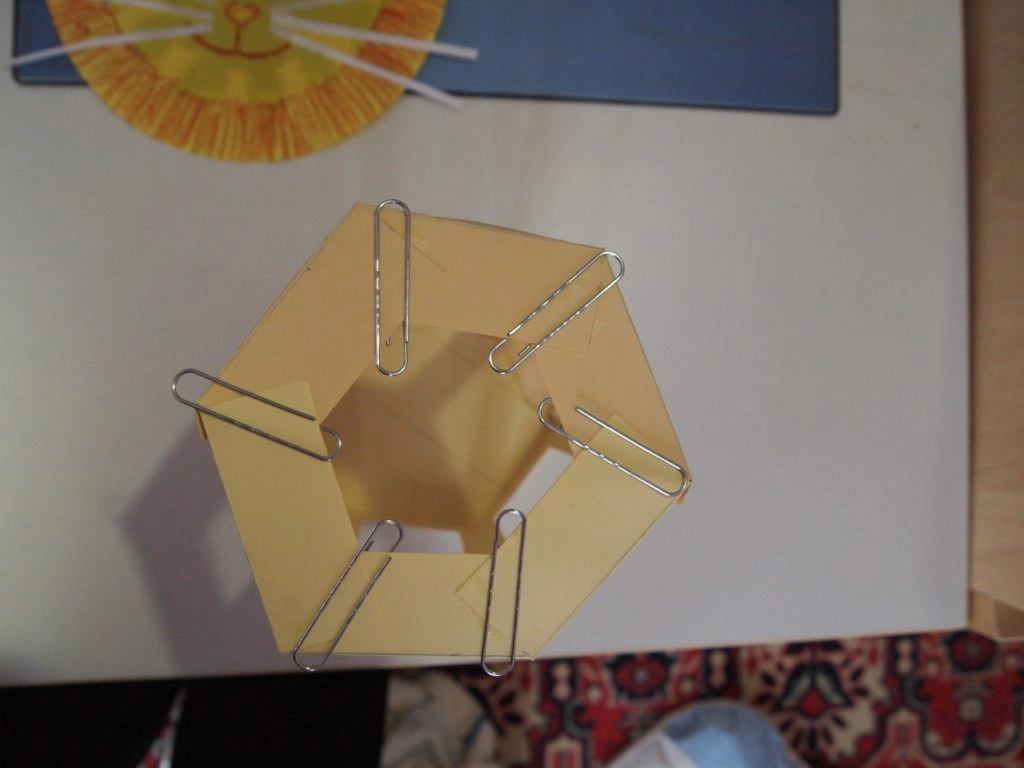
Town
Pattern for a regular prism with a hexagon at the base
If you want to fit on standard sheets of paper, then make six rectangles measuring 9 cm by 23-25 cm, adding 1-2 cm for the gluing along the strip on the sides and more from the top and bottom (especially from the bottom). Depending on the size of the paper, you may end up with two sheets paper with three rectangles on each or three sheets with two rectangles on each.
But 9 cm for lantern’s side is too narrow. So it is better to take larger paper and increase the width.
Cut windows in the rectangles. I cutted large windows, but it may be stars or moon or leaves etc.
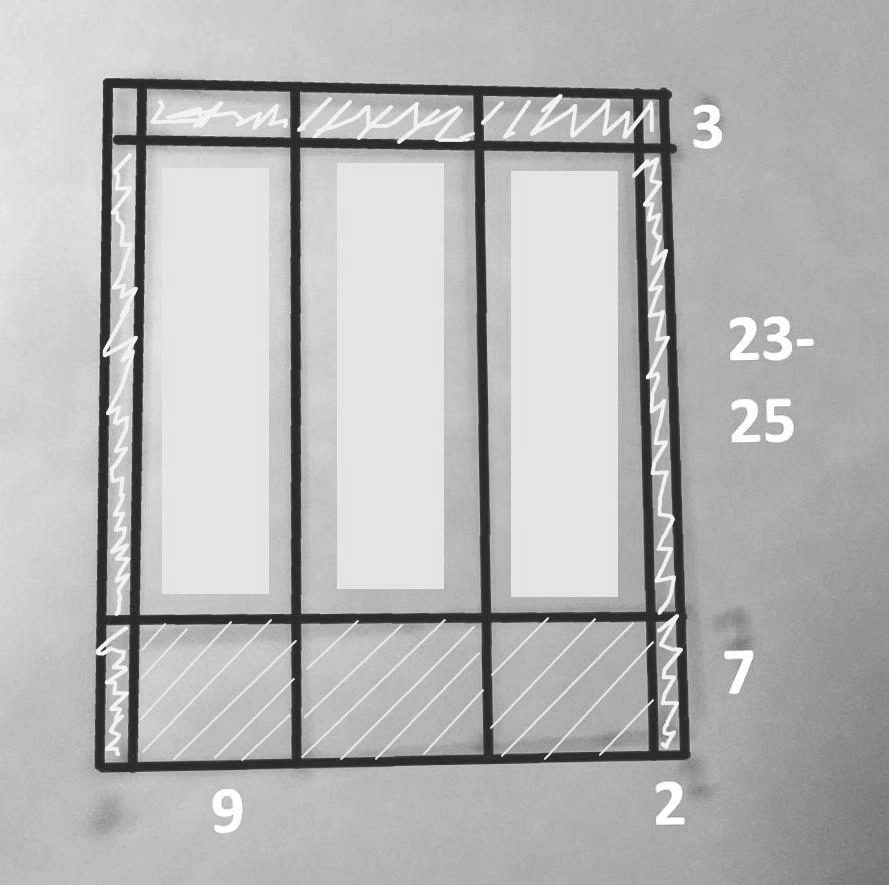
Glue transparent paper or oiled colored paper to the windows and then glue all together.
What I did with my “house” further, you find in the part 5.
Next: part 5 Lanterns with silhouettes.
part 1 Lighting and basic materials
part 2 Papier-mache, lampions, paper bags
part 3 Polygons, “cheese package”
Saint Martin Feast and songs for it
Do you enjoy the site without cookies and maybe without ads? This means that I work for you at my own expense.
Perhaps you would like to support my work here.
Or Cookie settings change: round sign bottom left